
The significance of an electric meat grinder to a home cook who seeks to enhance the quality of meals prepared at home and is a professional chef who aspires for perfection and speed is immeasurable. Choosing among the many brands available can be a bit complex, particularly when the issue of user comfort and excellent performance is central. This is where this manual comes into the picture. This comprehensive material aims to expose you to all the details of electric meat grinders, starting with an understanding of the tags and constructional parameters, and providing as precise advice as possible on which product is most suitable, depending on what you intend to use it for. By the time you finish the article, I will ensure that you are equipped sufficiently to make educated decisions regarding the electric meat grinder of your choice and that you invest your money in a machine that not only meets, but also exceeds your expectations. Meal preparation will never be the same again!
Understanding Meat Grinder
A meat grinder is an appliance typically used in the kitchen to process meat by tenderizing it or altering its texture to make it suitable for cooking. The working mechanism of the appliance is that large pieces of meat are minced in a hopper, which is placed above a rotating impeller. That impeller cuts meat into smaller parts that go through a perforated grinding plate of varying sizes, fine or coarse, depending on the hole size in the plate. This process is even more simplified by the introduction of electric grinders as the meat is ground more quickly than man powered ones. These electric grinders are particularly suited for sausage making, cutting burgers or other similar food recipes, for which meat that has not been processed at all will not be appropriate.
What is a Meat Grinder?
A meat grinder is a kitchen appliance that is used to break down raw or cooked meat to smaller portions according to the user’s preference. It does not rely on motors but works by a rotating abrasive mechanism that is powered by a crank. The meat is put into a funnel that has blades for cutting and a plate used for grinding. The grinding plate is available in different hole sizes that can help to make coarse, medium, and fine textures depending on the use. Some of the models have functions like reverse to process tougher items or prevent clogging during grinding. Modern electric meat grinders often have auto cut-off protection features or structural locking elements for use even when meat grinding is extensive. These aren’t only for use in homes. The merchants who deal with meat in kitchens need these items as well; these can grind out an entire barn full of beef at one go, yet the product stays the same, evenly textured and quality consistent.
Types of Meat Grinders: Manual vs. Electric
|
Parameter |
Manual Meat Grinders |
Electric Meat Grinders |
|---|---|---|
|
Power Source |
Hand-cranked |
Electricity |
|
Effort Required |
High physical effort |
Minimal effort |
|
Speed |
Slower processing |
Faster processing |
|
Portability |
Highly portable |
Needs power source |
|
Maintenance |
Easy to clean and maintain |
May require more detailed cleaning |
|
Capacity |
Small to moderate amounts |
Processes large quantities efficiently |
|
Noise Level |
Silent operation |
Can be noisy |
|
Price Range |
Generally low-cost |
Higher initial investment |
|
Durability |
Simple and long-lasting |
Durable but may include wear-and-tear parts |
|
Suitability |
Ideal for small-scale use |
Suitable for home and professional kitchens |
Benefits of Using a Heavy-Duty Electric Grinder
- Enhanced Efficiency and Speed
One significant advantage that comes with having a heavy-duty electric grinder over manual or smaller counterparts is the speed at which tasks are achieved. Literatures show that commercial-grade meat grinders can homogenize about 5-10 lbs of mixture per minute, making them suitable for large-scale mixing time frames.
- Consistent and Precise Results
Heavy-duty food grinders are made for reliable performance that includes equally sized particles. This is important for many industries, especially in the food industry, where the precision of creating the food is a driving factor.
- High Capacity for Large Quantities
Heavy-duty grinders comprise machines that can process anything from 15 to 50 pounds or more at a time, depending on the specific model, since they are capable of processing wide-ranging volumes. In fact, this makes it suitable for restaurants, butchers’ shops, and processing plants.
- Durability and Longevity
Robust construction materials like stainless steel and industrial aluminum are used for making such grinders, ensuring that they have long service lives. In fact, most models of such devices require regular maintenance as their performance does not significantly drop, mostly due to wear and tear.
- Multi-Functionality
Usually, a large number of heavy-duty electrical grinders come with different attachments and arrangements so that they can perform numerous tasks such as grinding, mixing and mincing meat. This is expedient in helping them perform more functions under different conditions.
- Time and Labor Savings
Electric Meat Grinders Reviewed
When selecting the best electric meat grinder, consider these key aspects:
- Motor Power
Grinders having power from a motor within the range of 500 and 1000 watts are considered appropriate for domestic uses, while those for commercial applications may require greater wattage to ensure efficient and consistent grinding performance.
- Durability
Those grinders manufactured using stainless steel or heavy-duty metal components will last longer since the materials’ properties prevent rust from occurring even after continuous use of the machine.
- Grinding Capacity
The grinding capacity of the machine is yet another aspect to be considered, which, from experience, is normally weighed in terms of pounds per minute. Generally, in small kitchens, a grinder slab with a capacity of 1-3lbs per minute should be more than enough, whereas the larger ones can be more for usage in restaurants..
- Ease of Cleaning
The models that come with several parts that are washable in dishwashers and very easy to disassemble are ideal; this can also be attributed to the fact that dishwashers simplify cleaning. This preserves the machine’s sanitary conditions and the machine parts’ working activities as well.
- Attachments and Accessories
Manual grinders have several options, including extra plates, sausage stuffing tubes, and other utilities, which provide convenience over the essentials for the task.
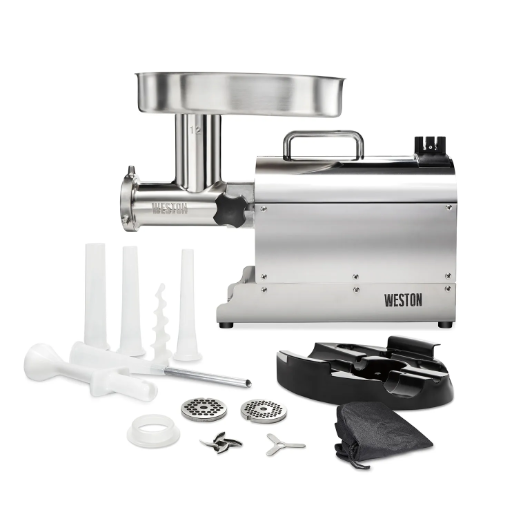
Weston Heavy Duty Electric Grinder
This is the place where the all-new Heavy Duty Electric Weston Grinder enters. It is designed for both home and professional use and is as efficient as it is long-lasting. This model is fitted with a 750-watt motor (approximately 1 HP), making it capable of producing meat at a rate of 4-6 pounds per minute, which is very powerful and consistent. The machine is completed with heavy stainless steel elements and a stainless steel body, and the stainless steel approach to wear prevention and rust resistance.
One commendable aspect of this grinder is the availability of coarse, medium, and fine stainless steel grinding plates, which help in achieving a particular consistency in various recipes in the industry. Moreover, the grinder has a sausage filling attachment along with the respective funnels for sausage fillings, thereby suiting a variety of cooking purposes. The user-friendly reverse function enables the recovery of the meat stuck in the worm of C. cam, utilized prior to making any further adjustments, which would have led to longer downtime.
Moreover, its size is smaller and the oval shape sits well in the hand and is simple to store out of the way, and also it has a washable surface. There are protective gaskets underneath every surface along the rubberized bottom surface that prevent slipping of the device and ensure a secure grip during operation. Equally easy is the putting together and disassembling of the appliance, guaranteeing that it can be perfectly cleaned after every use. The Weston Heavy Duty Electric Grinder is designed 100% to meet safety and health standards known to all meat factory workers and is thankful.
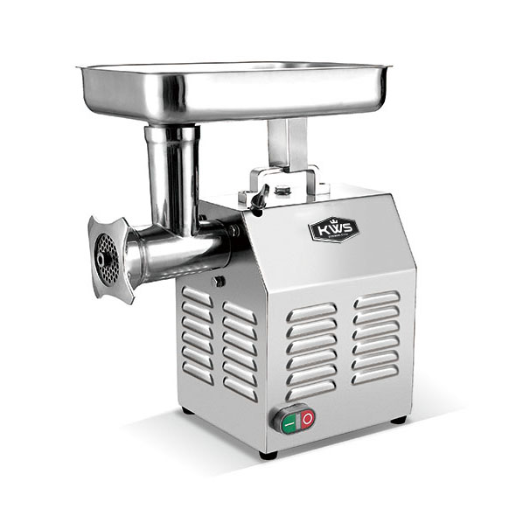
500-Watt Electric Meat Grinder
It is made up of a 500-watt capacity electric motor, and its meat mincer benefits from this combination, though it can also process high amounts of meat at a time. A 500-watt motor is fitted in the equipment, and the heating and grinding of meat is consistent, and in such a case, it is possible to do 4 kilos every 60 seconds, depending on the size and shape of the meat. A meat grinder must have three cutting plates for fine, medium, and coarse cutting made of stainless steel, which can be used to make the grind suitable for certain dishes or needs.
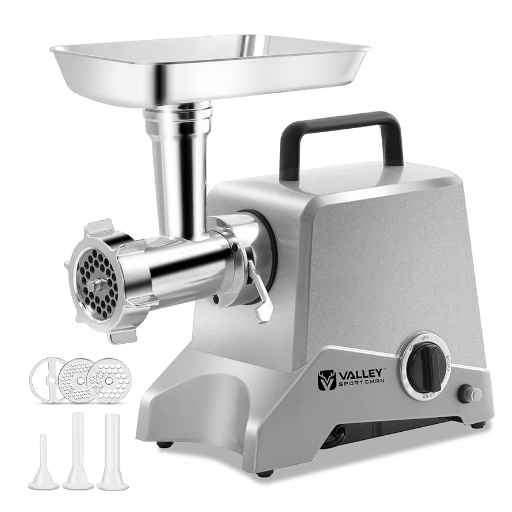
Features of a Heavy-Duty Meat Grinder
- High-Power Motor
Powered by a 500-Watt motor (with a peak power of 1200 Watts), this grinder provides heavy-duty performance to grind up to 3 pounds of meat every minute, making it perfectly useful in house and professional settings.
- Durable Construction
The grinder comes in a high-quality package made essentially of aluminum with no loose parts to bear pressure, which makes it durably resistant to even high or frequent stress.
- Advanced Grinding Mechanism
Comes with stainless steel blades and auger, and the quality of the grinds remains unchanged, with foxtotu’s quality.
- Removable Grinding Plates
For the purpose of various sausages, naklana and also on to a very proficient meat Gorilnik.
- Sausage-Making Attachments
The equipment comes with different sausage stuffing Hercules, which means it makes it feasible to do special dripless ferment, which might be good with any other type of sausage.
Choosing the Right Meat Grinder
- Capacity and Power
Pick a meat grinder that has a good motor power plus capacity for your tasks. A meat grinder for home use would typically have a 300-800-watt motor, while the commercial one should have a bigger motor for higher quantity processing.
- Material and Durability
Stainless steel is also commonly used for the body as it is very robust and does not suffer from changes such as corrosion, hence it can be used often.
- Ease of Cleaning
When it comes to maintenance, focus on food grinders with parts that are dishwasher-safe or that can be hand-washed with ease.
- Attachments and Accessories
And it has to come accompanied by the expected components, just like several grinding plates and sausage varieties, assuring that it will be useful for most of the dishes.
- Budget
Stainless Steel vs. Plastic: Which is Better?
|
Key Point |
Stainless Steel |
Plastic |
|---|---|---|
|
Durability |
Resistant to wear, long-lasting |
Prone to cracking, less durable |
|
Weight |
Heavier, more stable |
Lightweight, easier to handle |
|
Aesthetic |
Sleek, professional appearance |
Varies, often less premium |
|
Maintenance |
Easy to clean, resists stains |
May retain stains, harder to clean |
|
Corrosion Resistance |
High if properly treated |
No rust but less robust overall |
|
Cost |
Generally more expensive |
More budget-friendly |
|
Heat Resistance |
Withstands high temperatures |
May warp under heat |
|
Eco-Friendliness |
Recyclable, less environmental impact |
May contribute to plastic waste |
|
Longevity |
Designed for long-term use |
Shorter lifespan |
|
Suitability |
Ideal for heavy-duty use |
Better for light tasks |
Understanding Grinder Plates and Coarseness Levels
The output texture of all our materials can consist of elements from the grinding equipment, including grinder plates. They are designed to have various abilities and are made in different sizes, which can be inspired as fine, medium, and coarse. The size of the holes significantly affects the production rate. As the holes are smaller, the grinds will be finer, but coarser when the holes are larger. Thanks to such features, grinder plates can be effectively used for food facilities as well as for industrial technologies.
We would also like to emphasize that once all functions of the plates and the level of coarseness are in line with the specific objective at hand. For instance, most engines work with fine plates with hole sizes between 3/32″ and 1/8″, which are perfect for making sausages or chopping meat into patties without any pieces. Medium plates (about 1/4″) would be better for mincing meat for hamburgers because they provide a “sand-like” smooth finish to the meat. As for coarse plates above 3/8”, they are often used in bulk product manufacturing centers while making chili, certain types of vegetables, and the like, where rougher textures are desired.
When you are picking beef grinder plates, you should also factor in factors such as the maintenance practices, the frequency of usage and the materials used to make the plates. For this reason, users prefer the use of high-quality stainless steel price plates in the grinder as they do not corrode easily and will be used for a longer period as well. Grinders can also yield satisfactory performance to the users after understanding how different-sized grinder plates affect the output texture as per their needs.
Using Your Meat Grinder Effectively
- Pre-chill Your Equipment
With regard to order that dirty the taste of the liquid that has left for some of the elements in the machine to build a foul odor is not an easy task, in order to have a clean grind make them cold—these are the grinder elements namely the blades, the plates, the feed tube plus the meat inserts of the latter. The possibility of fat smearing is also minimized with cold processing and hence the final product quality is also consistent.
- Cut Meat into Smaller Pieces
Cut the meat into about uniform chunks of around 1-2 inches. This will help in easy grinding without causing lags.
- Avoid Overloading the Grinder
Do not hurry while grinding such that you place too much meat at a go and strain the grinder instead of the motor. Pushing the grinder to the fullest capacity can burn and damage the motor and change the quality of the grinding appearance in the process.
- Clean Immediately After Use
The internal parts should be taken out and cleaned thoroughly to prevent the equipment from being exposed to dirt and to extend its durability. When you clean the grinder, use soapy water for cleaning and use a brush for surfaces that are hard to reach.
- Regularly Sharpen or Replace Blades
When the blades are blunt, the grinds from the plates will be uneven, hence damaging the grinder. The blades need to be inspected and sharpened periodically if one wants the grinder to be efficient.
Preparation Tips for Grinding Meat
- Choose the Right Cut of Meat
Prefer cuts with a reasonable amount of lean meat mixed with fat, such as chuck or brisket, in the beef. Usually, a 70-30 lean-fat ratio makes for a satisfying and more flavorful ground meat.
- Keep the Meat Cold
Ensuring that the meat is at the correct temperature while being ground is important. Cold cuts can also cause smearing, reducing the achievable precision grind and/or causing excessive coatings of fat on the knives. To get rid of the fat smear, keep the meat in the refrigerator for half an hour, or in case you are in a hurry, only freeze it for fifteen minutes to harden it before grinding.
- Cut the Meat into Small, Even Pieces
Prepare the meat by chopping it into blocks or long pieces that are usually 1 – 2 inches in height. Larger, same-sized chunks enable the meat to slide into the grinder without hesitation and relieve the machine.
- Remove Excess Silver Skin and Tendons
Remove dense layers of muscle from meat before mincing to prevent clogging and reduce grinding time. This process ensures less work in the future and increases the quality of the grounded meat.
- Use a Chilled Grinder
Practical Tips for Efficient Grinding
- Cut Meat into Uniform Pieces
To achieve the best possible outcomes, ensure that the meat is cut into more or less equal-sized cubes, which are in the range of 1–1.5 inches. Having a standard size in cubes ensures more uniform placing of the meat, making it more hassle-free for the meat to enter the grinder, which in turn means there will be no bursting or obstructed grinding. Doing this helps to reduce the strain on the grinder moto,r which extends its useful life.
- Grind in Batches
It is not wise to fill large amounts of meat into the grinder all at once. Grinders are not meant to be filled, as this may cause uneven grinding, overheating or even jam the machine. For higher volumes of meat, there may be some breaks during the process due to the use of the grinder, in order to prevent excessive motor heating and maintain consistent workmanship.
- Choose the Right Grinder Plate
Grinder plates have different-sized holes that need to be chosen when making various textures. For the extraction of sausages or chili, select the larger holes (for instance, 3/8 inch or 9.5 mm). For batter, select smaller holes, e.g., 3/16 inch or 4.5 mm. Choosing the right plate in the grinder also guides the desired form of the product.
- Double Grind for Consistency
For a more homogeneous or less bumpy product, do two grinds. Use let’s say a coarse plate for the first pass and a finer plate for the second grind. This is specifically useful in case of a recipe that requires equal-sized particles, such as terrines or any finely ground sausages.
- Keep Fat Cold and Firm
Fat is utilized in numerous food dishes, and one must exercise caution while handling it. It should be sufficiently cold as well as girdle firm when working out to prevent avoidable smears. This could have an adverse effect on the texture and the final result. In case of dough grinding, place the meat and fat in the freezer for a very short time so that the fat hardens before grinding well.
Maintenance and Cleaning of Your Grinder
- Disassemble the Grinder
Very carefully dismantle all the elements most likely to be dismantled: the hopper, the cutting or slicing implement, and the grinding plates.
- Wash in Warm, Soapy Water
The clean up of each part should be done with warm, soapy water and thoroughly cleaned. A scrubbing brush should be used for stubborn soap buildup on the strainer. Do not wet the electrical working unit/s.
- Dry Completely
Dry out and assemble together in order to avoid any possibility of corrosion.
- Lubricate Metal Parts
Coat all the metallic bits with a protective layer of food-grade mineral. Do not forget to wipe the excess oil off with a rag.
- Inspect and Replace Components
Do recognize any instances of limited service, such as the blunt edge or the chipped plate, and replace them as needed so that the efficiency is maintained.
- Store Properly
How to Clean Your Electric Meat Grinder
- Disassemble the Grinder
Start by disconnecting the power plug from the electrical outlet. Carefully take the grinder apart fully in all its parts, remove the hopper, the auger, the grinding plates, the spade, and the feed tube.
- Pre-Rinsing Components
One needs to wash away meat residues and fats from all detachable elements by using warm water. At this stage, do not use hot water as it will encourage fats to stick together, and cleaning might become difficult later on.
- Cleaning with Soap
Fill the sink or another container with warm, soapy water and dip the components in it. Then use a soft brush or sponge to scrub all the grime, food particles, and even fat from the components.
- Sanitizing Parts
To make sure that you have been taking precautions, soak the external surfaces of cleaned components in a solution of household bleach with a concentration of one tablespoon of chlorine bleach for every gallon of water for a minimum of five minutes. Or even better, you could use kitchen sanitizer brands that are tested as safe to be used directly on the surfaces of kitchen equipment after cleaning.
- Drying Thoroughly
After sanitizing, rinse all parts with clean water sufficiently and then wipe them using a lint-free towel to soak up any water and prevent corrosion or bacterial development.
- Cleaning the Main Body
Move out of the way any dust or soil particles with a moist rag, working from outside towards the inner sections of the grinder. Never dip these components into water for cleaning, as any loose water in the appliance can cause malfunction of the internal electrical systems.
- Lubricating Metal Parts
Put some food-grade mineral oil on the grinder’s metal parts, the most important being the grinder plates and the blades, to improve their longevity through protection against rust and maintenance of their cutting ability.
- Reassemble and Store
Essential Maintenance Tips for Longevity
- Regular Inspection
At regular intervals of not more than one month, hold an inspection on the grinder so as to confirm that all parts are in good condition. Inspect for degradation, such as wearing out of parts or maintenance, such as dull cutting blades, crooked grinder discs, or loose screws, etc. Repair or replace any damaged parts immediately to prevent the issue from escalating and potentially affecting other parts of the machine. Findings emphasize that grinders given routine check-ups seemed to last between 15% and 20% longer than those not given routine check-ups at all.
- Proper Cleaning Frequency
After preparing any food through the grinder, it is essential to wash it, leaving no traces of the food, as this may encourage the growth of bacteria or rust. It has been reported in various research studies that regularly washing the appliance helps in reducing the rate of formation of metal-to-metal wear volume by up to 40%. Only use lukewarm water together with gentle soap to clean the grinder; harsh chemicals should not be used since they will damage the grinder beyond repair.
- Avoid Overloading
It’s important to follow safety measures when operating a commercial meat and food slicer, such as the indicated limit of meat that should go inside the grinder at a time. The first issue is the probability of damaging an over-extended product and also causing overwork at the motor’s shaft and its internal system. For instance, when the quality of a grinder says optimality to be 5 pounds of meat within a usage, you should not place anything more than that. According to test results that focused on abnormally tough conditions, loaded machines gave in 30% faster as compared to those that operated under normal conditions.
- Timely Part Replacement
Dispose of parts such as the meat grinder blade and plate once they are found to be blunt to the touch and after their due life has expired. On average, a moderately used grinder blade lasts between 6 and 12 months before wearing away with ease. Failure to replace these parts as they reach the end of their useful life poses a risk of organs/assets being destroyed, which accelerates wear and tear, leading to illogical and tiring work, and discouraging it.
- Motor Maintenance
Reference Sources
-
Meat Grinder–related Hand Injuries: A 50-year Systematic Review
- Key Findings: This systematic review analyzed 13 studies involving 121 patients with meat grinder-related hand injuries. It highlighted severe trauma, including amputations and sensory/motor deficits. Debridement and amputation were the most common treatments, with low replantation success rates. Long-term outcomes often included functional impairments.
-
Prevalence of Household Meat Grinder-Induced Severe Hand Injuries
- Key Findings: This retrospective study examined 64 cases of hand injuries caused by household meat grinders. Pediatric patients often experienced more severe injuries (e.g., wrist-level amputations), while adults had higher rates of fingertip amputations. The study emphasized the need for safety measures and public awareness to prevent such injuries.
-
- Key Findings: This study developed a meat grinder plate with variable hole diameters, improving meat quality and processing efficiency. The new design enhanced water-binding capacity, yield stress, and particle size distribution while increasing productivity by 50% and reducing power consumption by 7.3%.
Frequently Asked Questions (FAQs)
Q: What are the key features of the electric meat grinder for 12 lb of meat?
A: The electric meat grinder designed for 12 lb of meat typically boasts a powerful 1hp motor, ensuring efficient grinding. Most models come equipped with a stainless steel grinder head, which enhances durability and makes cleaning easier. Additionally, they often include a built-in pusher to help safely guide meat into the grinder without risk of jamming. Many grinders also feature various grinding plates, allowing users to achieve both coarse and fine textures, perfect for making sausages or fresh ground beef. For added versatility, some models may include three stuffing tubes designed for sausage making, giving you the ability to create your favorite meats at home.
Q: How do customer reviews rate the performance of heavy-duty meat grinders?
A: Customer reviews often highlight the performance of heavy-duty meat grinders as exceptional, especially when it comes to grinding larger quantities of meat. Users appreciate the efficiency of the 1hp motor that can handle tough cuts without overheating. Many reviews also mention the quality of the stainless steel stuffing plate and grinder head, which contribute to a long-lasting product that meets safety standards. Additionally, customers frequently praise the easy-to-use design and features like cord storage that make the grinder easy to store. Overall, the consensus among users is that investing in a heavy-duty meat grinder pays off in terms of quality and performance.
Q: Can a 12 meat grinder be used for making sausage with a stuffing tube?
A: Yes, a 12 meat grinder is well-suited for making sausage, particularly when equipped with a stuffing tube. The inclusion of a stainless steel stuffing plate and three stuffing tubes enhances the grinding experience, allowing for smooth and efficient sausage making. Many models also come with a powerful grinder machine that can easily handle various meats, ensuring that the texture remains consistent. It’s important to follow the manufacturer’s guidelines for proper use to prevent jamming and ensure safety during the process. With the right attachments, you can create delicious, fresh-ground sausage with ease.
Q: What makes a 12 meat grinder a good choice for home use?
A: A 12 meat grinder is a great choice for home use due to its balance of size, power, and versatility. The compact design allows it to fit in most kitchens without taking up too much space, while the 1hp motor provides ample power for grinding large quantities of meat efficiently. Many models come with a variety of grinder heads and plates, making it easy to switch between coarse and fine grinding, which is essential for different recipes. Customer reviews often highlight the ease of use and cleaning, thanks to features like removable parts and stainless steel construction. Overall, it’s an excellent investment for anyone looking to prepare fresh ground beef or homemade sausage.
Q: What safety standards should I look for in a heavy-duty meat grinder?
A: When considering a heavy-duty meat grinder, it’s essential to check for compliance with safety standards such as ETL certification. This ensures that the grinder meets specific safety and performance criteria set by regulatory organizations. Additionally, features like a built-in safety switch and design elements that prevent jamming are important for ensuring safe operation. A sturdy stainless steel construction not only enhances durability but also contributes to food safety. Users should also look for machines with good customer reviews regarding their safety features, as this can provide peace of mind during use.


