
Grinding meat at home can improve the taste and consistency of your meals, offering a new option to frozen products. Whether you lack a meat grinder or like doing things manually, this article presents different ways of mincing meat perfectly without any special tools. We will talk about everything from using a food processor to knife work on the cutting board, as well as other manual methods that may be useful when grinding various kinds of meats for burgers or sausages. With these skills under your belt, you will be able to ensure high-quality ingredients and take cooking up another notch altogether!
What are the Alternatives to a Meat Grinder?
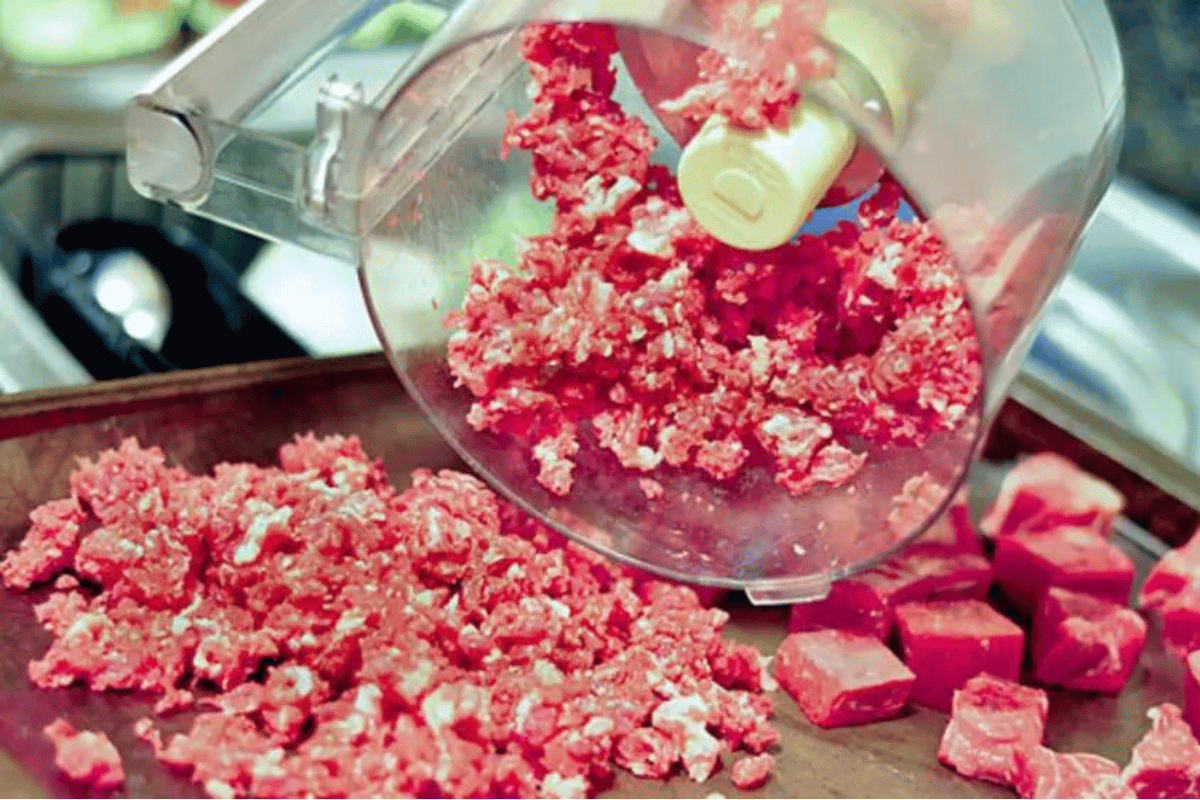
how to grind meat without a grinder
In terms of substitutions for grinding meat, there are many ways this can be done without using a meat grinder. Here are some alternatives that people commonly use:
- Food Processor: To grind meat easily, try cutting it into little uniform pieces and then pulsing them in a food processor until you get the right texture. Be careful not to overprocess.
- Blender: A blender can also be used to grind meat, although it is not as popular as a food processor. Use small chunks and set the blender on low speed to achieve the desired consistency.
- Sharp Knives: If you want more control over what you do manually, use a sharp chef’s knife. Work on fine-chopping the meat or working with small batches for even-texture results.
- Box Grater: For those who prefer a finer grind when using non-electric tools, a box grater may be used, too. Just take care while shredding and running your fingers along the coarse side of the grater.
- Mortar and Pestle: This traditional tool is great for grinding small amounts of meat into paste by hand. It also allows you to add flavorings during the process.
- Rolling Pin: You could put your meat in a sealed plastic bag (for quick options) before crushing and flattening it with a rolling pin, then chop finely afterward.
- Potato Masher: A potato masher can be used to mash soft meats like cooked chicken or pork into a ground texture.
- Cooking Process: Cook the meat like in a stir-fry, breaking it into smaller pieces as it cooks with a spatula.
- Scissors: Kitchen scissors can come in handy when cutting up small pieces of meat, especially if they are raw poultry or fish-related issues that need addressing.
- Food Mill: You might need less common appliances, such as a food mill, to grind cooked meats, which will result in smoother textures best suited for certain recipes.
Each method has its pros and cons, but ultimately, the desired texture will dictate the choice, depending on the prepared dish. Try these techniques out at home for interesting results with meat grinding!
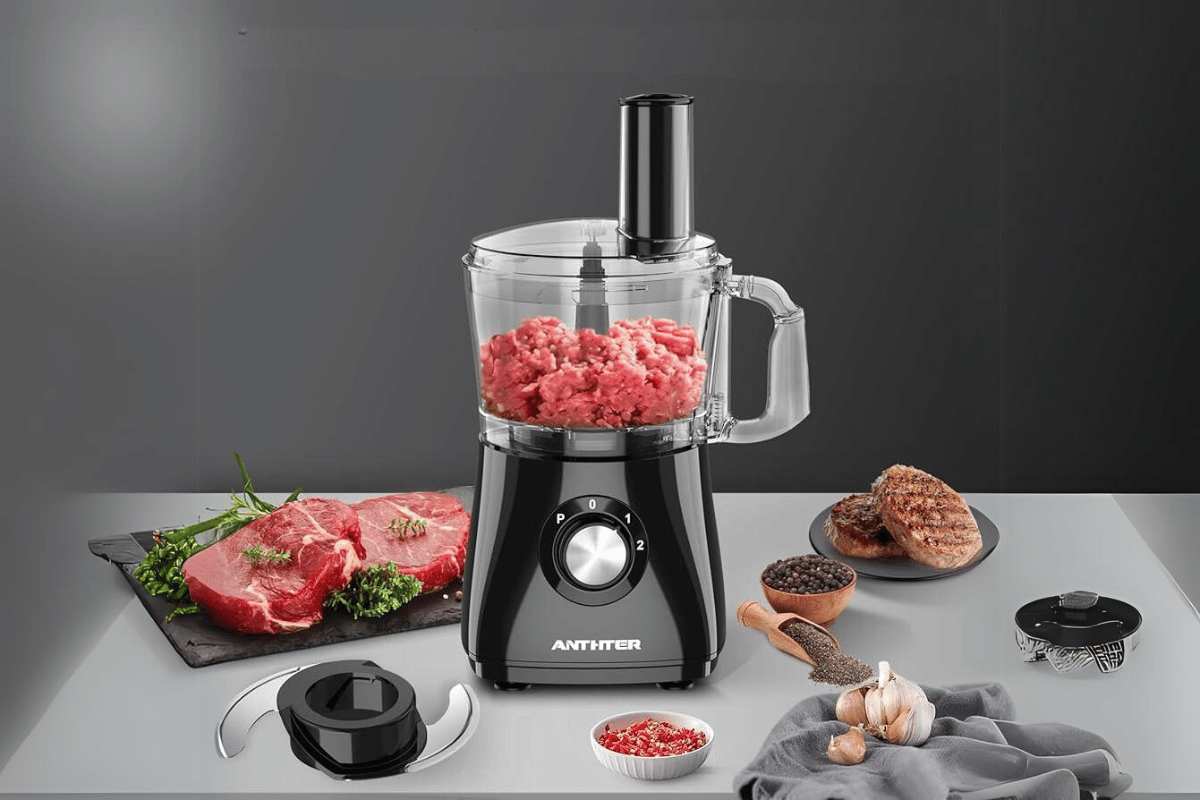
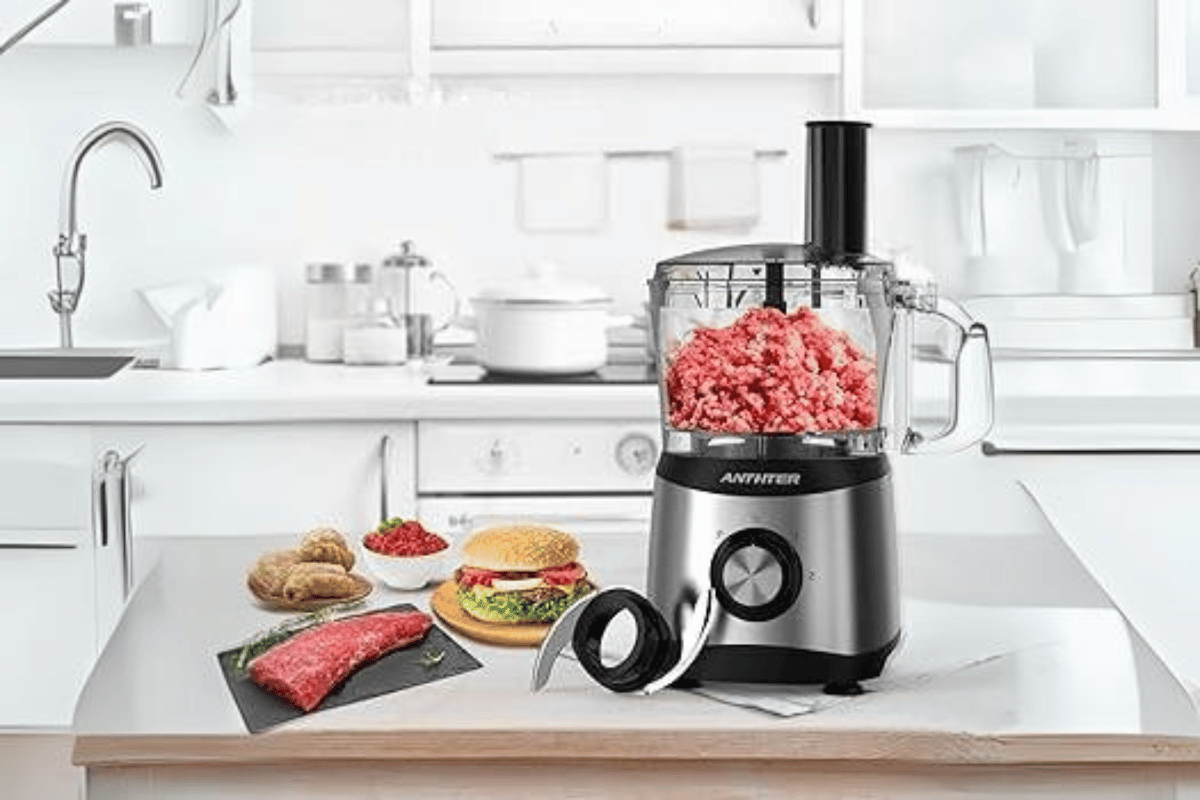
Using a Food Processor to Grind Your Meat
If done correctly, grinding meat with a food processor is efficient and convenient, achieving excellent results. Here are some things to consider and methods to follow, according to information from different reputable sources.
1. Cutting the Meat: To ensure an even grind, cut your meat into uniform 1-inch cubes before grinding. This will enable the food processor to work effectively without overworking it.
2. Chilling the Meat: For the best texture, it’s important to chill the meat and even the bowl and blade of your food processor in the freezer for about 30 minutes until they turn cold. Cold meat is ground more uniformly, which also helps to avoid mushiness.
3. Batch Grinding: Do not grind more than 1-2 pounds at a time; this should be done in small quantities. The reason for this is that you don’t want to overwork your machine nor do you want unevenly ground meat
4. Pulse Function: Use the pulse function on your processor to control how finely or coarsely minced/ground something becomes. After every few seconds, check whether it has reached the desired texture.
5. Technical Parameters:
- Size of Blade: A regular home-use 10-cup capacity machine would suffice, but ensure that its blade is sharp enough and designed for mincing meats, thus producing fine results.
- Power Rating: If possible, get a powerful appliance with at least 600 watts because it can handle tougher cuts without getting stuck due to overheating or jamming.
6. Cleaning Up: Once through with everything, always take out time immediately, then cleanse well all parts, especially at the bottom, where there could be hardened particles resulting from drying up juices or fats during processing—these might prove stubborn when trying to remove them later on.
Following these tips, along with observing proper hygiene, will help one successfully grind their own meat using a food processor while achieving high standards applicable across various recipes.
Hand-Chopping Meat with a Sharp Knife
I follow safety measures and apply the right approach to get the best outcome while manually cutting meat. The first thing I do is to check if my knife is sharp enough since a blunt one can easily skid off causing accidents in the process. My favorite option is an 8 to 10-inch chef’s knife because it offers sufficient control plus leverage when using it. It should be on top of a stable, clean surface used for cutting that absorbs some impact from knives made of wood or plastic, which are also easy to maintain, thus keeping them sharp.
Technical Parameters:
- Type of Knife: Select a high-carbon stainless steel chef’s knife, which lasts long and maintains sharpness.
- Size of Blade: A blade measuring between eight and ten inches allows versatility while cutting various meats.
- Material for Cutting Board: Opt for hardwoods such as maple. They absorb the shock produced during chopping, reducing the frequency at which blades need sharpening.
The actual practice involves slicing meat into small, manageable portions by making neat, even cuts across its grain lines so that it cooks uniformly and looks more appealing after being served. I always stick to these methods and their accompanying rules. Not only does this make work easier, but it also ensures safety throughout my preparation of meat procedures.
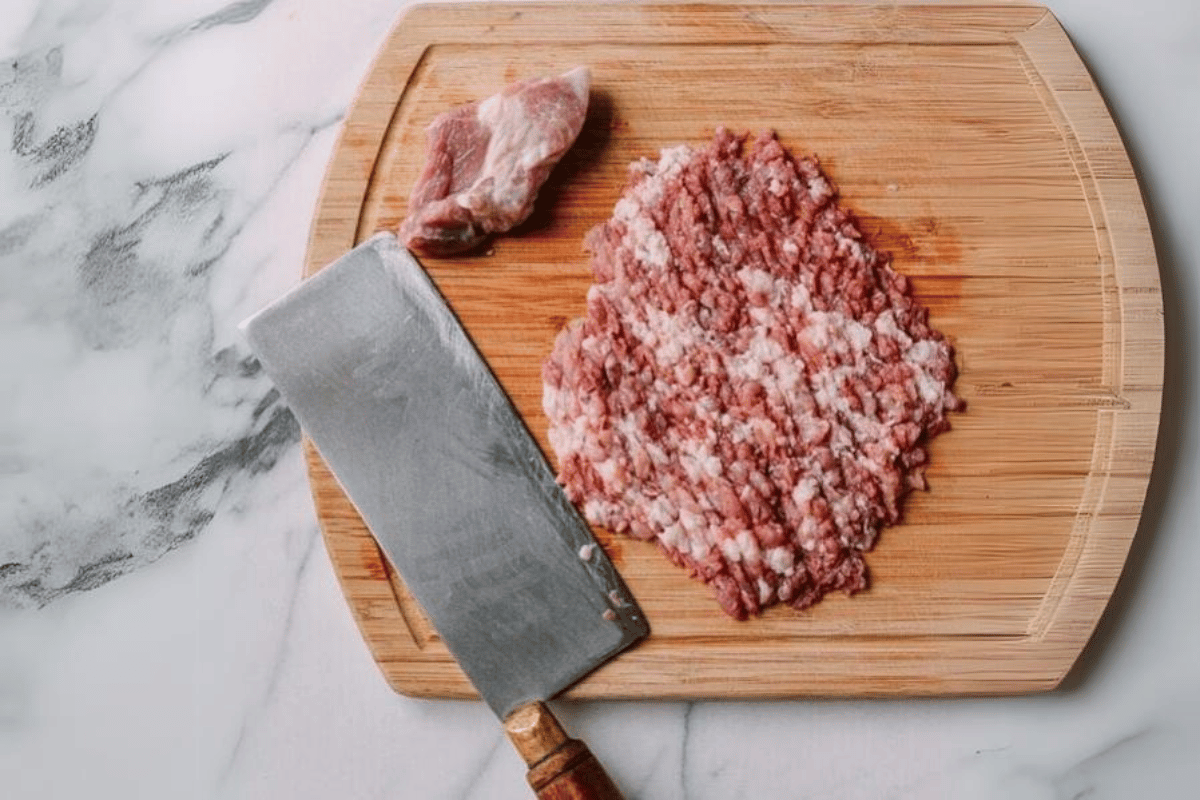
Using a Cleaver to Mince Meat Without a Grinder
When I mince meat with a cleaver, I value technique and the right tools. A cleaver is very useful for cutting up tough meat parts and giving it a coarse texture that electric grinders cannot achieve. The first thing I do is ensure the weightiness of my cleaver; typically, a properly balanced one about two or three pounds heavy provides enough strength without straining my wrist.
Technical Considerations:
- Type: Opt for a heavy-duty, high-carbon stainless steel cleaver for long-lastingness and effective chopping.
- Weight: 2-3 pounds should suffice as it gives the necessary momentum but remains manageable enough for precision.
- Cutting Board Material: It’s better to go with thick wooden boards since they absorb some shock from impacts made by the cleaver, which can thus help protect both the board itself and the blades used on it.
What I usually do is cut meat into smaller pieces so that it becomes more wieldy. With this implement in hand, I rock back and forth while hacking at meats, which leads to even mincing. From time to time, I gather what has been chopped together into piles before resuming the chopping process until the desired consistency is achieved. Not only does this keep its goodness intact, but it also gives me a freshly minced base suitable for any dish that requires such.
How to Use a Food Processor to Grind Meat?
A very easy method of grinding meat is using a food processor. Firstly, cut the meat into smaller pieces, such as 1-inch chunks, so that it will grind more evenly. After that, put the meat in the freezer for about 20-30 minutes until it becomes firm but not frozen hard; this will help the processor handle it better and prevent mushiness.
When you have everything ready, fill no more than half a bowl with meat cubes, then insert them into your food processor’s bowl. Process meats briefly but several times at intervals using the pulse option until they attain the desired consistency; avoid blending too long, or they may turn into pasty-like puree. Scrape sides occasionally while grinding to get an even texture throughout all particles ground together uniformly. Stop if there are still bigger chunks left for coarse grind but continue pulsing until smooth for finer one. Finally, pack ground meats into a dish or any other storage unit where you will keep them before cooking according to your recipe requirements.
Choosing the Right Cut of Meat
The success of your dish, which has different tastes and textures in various cuts, depends on choosing the right meat. Here are some things to think about:
- Intended use: Determine if the meat will be grilled, braised, or put in stews. Ribeye or sirloin cuts work well for grilling, while chuck or brisket, being tougher cuts, are good for slow cooking.
- Fat content: The flavor and tenderness of the meat are influenced by the amount of marbling (intramuscular fat) present. Filet mignon or tomahawk with high marbling will yield a juicier result.
- Texture—The desired texture for your dish should also be considered. Tender cuts are suitable for quick cooking methods, whereas tough ones require longer cooking time to break down collagen fibers.
- Cooking method – Different cooking methods call for specific cuts; steaks come from loin and rib sections, while stewing meats are derived from chunks or round parts.
- Weight/Serving Size—Sometimes, recipes require using a certain weight of cut. Smaller pieces are generally easier to handle and cook faster, while larger ones might need more preparation.
- Price—Consider budget, too; tenderloin is premium-priced compared to shoulder or neck, which are less costly.
By following these guidelines, one can make educated decisions that align with their culinary aspirations, thus achieving better outcomes while preparing food.
Preparing and Chilling the Meat
When I prepare meat, especially following advice from the best culinary websites, there are several factors that I give priority to to achieve the best flavor and texture. This is what I do:
- Defrosting: To avoid bacterial development, I always thaw meat in a refrigerator, not at room temperature. This approach maintains the meat at safe temperatures throughout defrosting, so it stays fresh.
- Time for marination: Depending on the piece, I vary the time I use to marinate it so that it can absorb more flavors. A minimum of six hours works for me with tougher cuts like flank steak, while shorter periods of one or two hours work better for more tender ones because longer soaking overpowers their inherent taste.
- I keep meats at a chilling point of 40°F (4°C) or lower, ensuring their safety and quality without spoiling them. Thoroughly chilling meat after preparing it becomes more essential, especially if there are any intentions of cooking it later on.
- Storage period: Normally, ground meats should not be kept beyond one or two days, while whole cuts may stay up to five days in a fridge, according to my observation over time. Additionally, I must mark my packs with dates to monitor freshness easily.
- Preparation surface: For hygiene purposes during the cooking process, meat should be prepared on different boards from other food items since this helps prevent contamination across meals. Therefore, having a separate board meant for meat preparation only enhances hygiene levels at home when cooking various dishes.
Following these rules will guarantee that you have tasty, safe-to-eat meat that is ready for different cooking methods.
Pulse the Meat to Avoid Over-Processing
With ground meats, I feel that using a food processor and pulsing the meat are essential steps in reaching the desired texture. These are a few things that I have learned about this method from various culinary sites:
- Pulse (Technique): You can control how blended or pasty it gets by pulsing in short blasts rather than keeping it on continuously. For best results, chop your meat into smaller pieces before processing so they’re more uniform.
- Length (Time): Typically, I’ll pulse for 2-3 seconds and check between pulses to see where it’s at regarding coarseness. Top sources suggest no longer than 30 seconds to keep a rough texture throughout, which is good for things like burgers or meatballs.
- Chill It: Make sure the protein is well chilled before entering the machine. Colder proteins hold their structure better while grinding than warm ones. They should be under 40°F (4°C) before being pulsed.
- Keep Cool: Another thing I consider is how long my machine runs because extended periods of running generate heat, which can change fat content percentages and final textures on meats. So, instead, I give intermittent bursts of power to maintain low temperatures.
When these technical boundaries are followed, I get perfectly processed ground meat that brings out all the flavor of my recipes without making them spongy through overworking.
What Types of Meat Can You Grind Without a Grinder?
You can quickly grind a range of meats without using standard grinders. These include, but are not limited to:
- Beef – Chuck, sirloin, or brisket cuts are best for mincing as they produce a rich taste.
- Pork – Pork shoulder or butt is often recommended because it has balanced amounts of meat and fat that ensure moistness in the grind.
- Chicken – Whole chickens or specific parts such as thighs offer versatility; skin-on cuts yield juicier results than those without skins.
- Turkey – Leaner and less strong-flavored alternatives may be obtained by grinding various cuts of turkey meat.
- Lamb – Richly flavored meat can be made from ground lamb leg or shoulder, among others.
- Fish—For example, salmon or tuna may also be minced and used in making patties or spreads due to their firmness when raw.
- Venison – This type of game meat can be ground using either shoulder or hindquarter cuts thus providing leaner option .
- Rabbit Meat Ground rabbit is an uncommon ingredient that greatly contributes to taste enhancement, especially in some traditional meals.
A good selection of pieces, hand chopping, and food processing can enable you to successfully mince these meats even if you don’t have any special appliances at home.
Grind Beef for Burgers and Meatballs
When grinding beef for hamburgers and meatballs, I ensure the texture and taste of the meat is correct by following some steps. The perfect combination of meat and fat can be achieved through the use of cuts such as chuck or brisket which should ideally have about 15-20% fat content, this is important for moisture and flavor. Next, I cut it into small, even pieces before putting them in a freezer for approximately half an hour. This makes the meat hard hence easier to grind without turning it into paste.
Technical parameters:
- Fat content: Juicy burgers and meatballs must be ground with 15-20% fat content.
- Meat temperature: It should remain cold (approximately 32°F) while being ground so that its structure does not change and smearing during processing is prevented.
- Grinding Speed: Low-speed grinding avoids overheating, which may affect the final quality of ground products made from meats.
- Batch Size: To maintain consistency throughout the process, small quantities are ground at once, ensuring evenness in textures among different batches.
The above technicalities guarantee me an excellent grind that produces delicious burgers and meatballs since they are juicy and flavorful with a good bite.
Ground Chicken for Dumplings
I use various chicken parts, such as thighs or a combination of breasts and thighs, when grinding for dumplings to increase the taste and moisture. The chicken should be well chilled before being ground so that it does not turn into a paste during processing while maintaining a good texture.I usually grind meat twice so that it can have a finer consistency, which is perfect for dumplings.
Technical Parameters:
- Fat Content: Select cuts having roughly 10-15% fat content to keep them juicy and tender.
- Meat Temperature: Keep the chicken at around 32°F to prevent smearing and ensure clean grinding action.
- Grinding Method: Use a food processor with a pulse setting to control size effectively.
- Batch Size: Grind small quantities at once for evenness throughout the mixture.
These parameters help me ensure that my ground chicken is moist enough and has the right texture, which leads to well-cooked, tasty dumplings that hold together.
Other Types of Meat You Can Grind
Besides chicken, a variety of other meats are fantastic for grinding, as they each bring different flavors and textures to my dishes. Here are some of the best options and their technical considerations:
1. Beef: I frequently grind chuck roast for burgers because it has even more fat.
Technical Considerations:
- Fat Content: Ensure you have 15-20% fat to maintain moisture and tenderness.
- Temperature: Keep the meat at around 32°F to avoid smearing during grinding.
- Grinding Method: Use a meat grinder in a coarse setting for burgers.
2. Pork: Ground pork is versatile and great for sausages or meatballs.
Technical Considerations:
- Fat Content: Select cuts with 20-30% fat for better flavor and juiciness.
- Temperature: Keep the pork at 32°F for ideal texture while grinding it.
- Grinding Speed: Use slow speed to prevent overheating during the grinding process.
3. Lamb: I enjoy using ground lamb because it has a rich flavor, especially in Mediterranean dishes.
Technical Considerations:
- Fat Content: Seek 15-20% fat content for balanced moisture in ground lamb.
- Temperature: Grind lamb when very cold (around 32°F).
4. Turkey: Lean ground turkey can be a healthier substitute in many recipes.
Technical Considerations:
- Fat Content: For more flavor in ground turkey, use dark meat with about 8-12% fat content.
- Temperature: Keep turkey cold (about 32°F) through grinding to avoid pastiness or deterioration
- Grinding Method: Medium grind gives consistent texture
5. Venison: Venison is lean with a strong taste, which makes it perfect for game dishes.
Technical Considerations :
- Fat Content: Blend with pork fat (20% venison/10% pork) to add moisture when cooking.
- Temperature: Keep it at around 32 degrees F so you can get clean grinds every time.
By knowing these factors, I can grind different types of meat effectively while preserving their individuality and integrity in my cooking.
How to Hand-Chop Meat to Achieve the Desired Texture?
Using a knife by hand to chop meat is one way of achieving a particular texture when you do not have a grinder. Here’s how you can reach the consistency that you want:
- Choose the Right Knife: A sharp chef’s knife ensures chopping accuracy. For safety, use a clean and stable cutting board.
- Prep the Meat: Trim off any excess fat or sinew from the meat, then cut it into 1-inch cubes or manageable pieces. This will help make an even chop.
- Chill the Meat: You may want to consider chilling your meat in the freezer for about 15-30 minutes before chopping. This makes it firmer and more accessible to chop, preventing it from becoming mushy.
- Chop Gradually: Rock back and forth with the knife while lifting at one end, starting from either side, until you reach another end of your cutting. Keep your fingers tucked in to avoid accidents, and ensure that only the tip touches down on your cutting board.
- Check Texture Regularly: Stop occasionally during chopping to check if what has been achieved so far is okay regarding fineness or coarseness. You may continue doing this until finely chopped for dumplings or roughly chopped for burgers.
- Use a Meat Cleaver for Specific Cuts: If working with stricter meats like beef shank or more significant cuts such as whole chicken legs, use a heavier-duty implement like a cleaver, which can easily break down muscle fibers due to its weight alone without much effort required from user-end (especially helpful when dealing with bone-in portions).
By adhering to these steps, one can effectively hand-chop meat for different dishes since they require specific textures depending on their nature.
Using a Sharp Knife to Chop the Meat
When you chop meat, it is essential to use a sharp knife for safety and efficiency. Based on my experience and research from reputable sources, a sharp blade requires less effort and gives cleaner cuts, which are crucial in terms of presentation and texture. I like using chef’s knives with 8-10 inch blades because they offer good control without being too heavy.
In terms of technical specifications, here are what I consider to be best for performance:
- Material: Stainless or high carbon steel that does not quickly lose its edge and get rusted.
- Thickness: It is about 2-3mm thick, which provides a balance between strength (durability) and keenness (sharpness).
- Edge Angle: A versatile chopping tool should have an edge angle of about 20 degrees, which allows it to be easily applied to different tasks.
- Comfortable handle: When selecting handles, they should be Ergonomically designed handles made from materials that provide a good grip even when hands are wet, thus minimizing hand tiredness during prolonged usage.
As part of my routine practice, before every use, I usually sharpen the blade to keep it sharp always, which ensures accurate cutting. This method has worked well for me since it supports some of the most recommended approaches by various online culinary experts.
Steps to Mince Meat Without Using a Meat Grinder
To chop up meat properly when you don’t have a meat grinder, I use this brief guide inspired by the most popular online culinary resources:
- Pick the Right Cut—My preferred choice includes parts that contain both muscle and fat in equal measure. Sirloin, chuck, or shoulder cuts are all good because they have great flavor and texture when minced.
- Chill the Meat—Before anything else, I put the meat in the freezer for about half an hour to firm it up enough for clean cutting.
- Make Smaller Pieces—I cut them up into small cubes uniformly with my sharp chef’s knife while they are still cold, which makes it easier during the grinding process because less effort will be required.
- The Rocking Motion—For finer pieces: At an angle but keeping the straightness of the blade intact, use a rocking motion, like back-and-forth movement, until everything gets chopped finely, even though sometimes you might need to press hard and then release softly. Otherwise, the results won’t be uniform since some chunks will be left uncut.
- Repeat If Necessary – Sometimes if I want a more fine mince than what was achieved after doing step four above; gather all these tiny bits together again into one heap before chopping them further until desired fineness is reached which could take several tries depending on how delicate or tough my fingers are feeling at that moment.
- Troubleshooting—If it becomes too soft while working with it, return it to the freezer for a few minutes to firm it once again to ensure that precision in mincing is maintained.
Justification of Technical Parameters:
- Choice of Cuts: Different cuts will affect taste and texture when grounded, respectively, affecting the final product’s flavor profile.
- Time for Freezing: The period it takes to chill should be around 30 minutes because if left longer, this may lead to dehydration, which in turn causes a loss of moisture content, which causes sogginess during the cooking process.
- Knife Work: Use a rocking motion where your wrists remain stationary as blades move up and down. This allows me to easily cut through fibers with little effort while ensuring clean cuts.
These procedures enable me to produce ground beef comparable to what would have been done by a processor. Thus, this enhances the flavors in my recipes while also improving their appearance.
Tips for Achieving Consistent Meat Cubes
- Invest in a Good Knife: A chef’s knife must be sharp. If I have a sharper blade, I am able to make neat cuts without any rough edges that might ruin the meat. This goes back to my knife skills because when my knife is well-kept, it becomes easier for me to chop with it or even slice through things.
- Use a Steady Cutting Board: My cutting board mustn’t move whenever I cut anything. If the board slips, all the accurate cuts will be lost. To improve safety and accuracy, one can put a non-slip mat under their cutting board.
- Control Temperature: I must keep the meat cold at all times. When the meat starts getting soft, I may need to freeze it again for some time as per the freezing time parameter. This helps maintain the firmness of the meat so that I can easily get even-sized cubes.
- Cut Across The Grain: I always ensure that when cutting my meat, all slices are made against its grain for tenderness. This also helps achieve uniformity since cubes cut along grains tend to be chewier than those across grains. Thus, this connects with cut selection technicalities, where appropriate choices should affect tenderness, too.
- Ensure Evenness In Size: Every time I make cubes out of anything, one thing stands out—they must be the same size throughout, lest there be any texture consistency in my dishes. Uniformly shaped pieces also cook faster, speeding up the cooking process. Precision can be enhanced by using measuring guides or templates while doing this.
By following these tips, I find myself making consistent meat cubes that take my cooking to another level, as it guarantee flavour and enhance texture
What are the Benefits of Grinding Meat at Home?
Grinding meat at home can be a lot of fun and make your meals taste better as well. Here are some reasons why:
- Newness and Taste: Usually, meat ground in the kitchen is fresher than what you get from the stores, which makes dishes more flavorful.
- Ingredient Control: By grinding your own meat, you can choose which parts of the animal go into making ground beef, for example. Thus, you can ensure higher quality without unwanted additives or fillers often found in pre-packaged ground meats bought at grocery stores.
- Affordability: Whole pieces of meat are less expensive than already ground ones, especially during sales; therefore, purchasing them saves money, too.
- Uniqueness: Fat levels can be adjusted by mixing different kinds of meats together, resulting in something with its own special flavors and textures based on what one’s recipe requires.
- Lower Fat Content: People who grind their own meat have an opportunity to create mixtures that are healthier with fewer calories by using only lean cuts, thereby reducing the final product’s fat content.
- Waste Reductions: Utilizing less desirable cuts or leftovers helps minimize wastage. Every bit counts when it comes to eating animals, so why not grind them all?
- Inventiveness: Another advantage of grinding one’s own meat is that it opens the door to trying out various combinations that might never have been possible were ingredients already blended beforehand during packaging stages—this brings about unique recipes, too!
If consumers opt for homemade ground meat, not only will they notice a great improvement in meal quality, but they will also save lots of dollars and time while preparing food.
Quality Control Over Your Ground Meat
Quality control over your soil meat is necessary for safety, taste, and nutrition. Here are some points to consider:
- Meat Source: Always choose good-quality cuts from reputable suppliers. Freshness can be ensured if the meat is bright in color and has little marbling.
- Grinder Equipment: Select a grinder that suits your needs. For efficient grinding and long service life, opt for one with stainless steel blades and a powerful motor (300–500 watts minimum for home use).
- Temperature Control: To preserve the texture, keep the meat cold before, during, and after grinding so that bacteria do not develop. Aim for temperatures below 40°F (4°C) pre-grind.
- Cleaning & Sanitizing: Clean everything carefully before usage and sanitize it thoroughly afterward to avoid cross-contamination risks between batches; use hot, soapy water followed by a disinfectant solution.
- Consistency of Texture: Depending on what you’re making, adjust plate sizes, which determine the coarseness or fineness of ground meat. Preferably, an eight-millimeter should be used when preparing burgers, while three-millimeters work best with sauces containing minced beef.
- Fat Content: Ground beef should contain around 15 – 20% fat, ensuring juiciness without being too greasy.
- Storage: After grounding, store in a vacuum-sealed package and freeze if unused within forty-eight hours; this maintains its freshness and prevents freezer burn at temperatures below zero degrees Fahrenheit (-18°C) or lower.
- Batch Consistency: Grind small amounts at a time so that the textures of different types of meat mixed together remain consistent.
Following these controls will guarantee the taste desired, thus maximizing the health benefits expected from homemade ground meat while minimizing the risks related to foodborne illnesses.
Avoiding Additives in Store-Bought Ground Meat
When buying ground meat from the supermarket, I look for additives by reading labels and preferring products emphasizing their natural components. This is because common brands often fill their meat with preservatives, which lower its quality. Another reason why I won’t touch such meat is because it usually contains binders and fillers, too. To avoid eating what my body does not need, I always go for beef labeled as “100%” or “without any additives or preservatives.”
Furthermore, I am also concerned with where the animal came from. Among other things like being grass-fed and antibiotic-free, organic meats are known to have less of this stuff in them. These are some of the technicalities that I take into consideration:
- Ingredient List: The fewer additives there are indicated by a shorter list of ingredients.
- Seal of Quality: For instance, USDA Organic ensures specific standards are adhered to during the production process
- Fat Content: Moisture should be retained without excessive amounts of additives, so the fat ratio should be around 15-20%.
All these steps help me find ground meats that suit my taste and keep me healthy by avoiding unwanted chemicals.
Cost-Effective Way to Grind Meat
I look at some commonly shared strategies from renowned cooking sites to save money when grinding meat. At first, one of the things that could achieve this is purchasing a high-quality meat grinder because it can be expensive initially but saves you more in the long term. This allows me to acquire large portions of meat, usually sold per pound cheaper than those already ground. Moreover, I always advise people to buy in bulk; for instance, sometimes whole cuts may be on sale, and one can grind them as required.
When considering the technicalities involved:
- Type: Manual grinders are cheaper than electric ones, although they offer convenience, too. However, they might have higher initial costs.
- Technique: I prefer partially freezing the meat before grinding so that it becomes easy to work with while still achieving even texture.
- Variety: I mix fat-content-based cuts, with my target being 80% lean meat combined with 20% fat, since this gives the best taste and juiciness.
These steps not only guarantee the freshness and standardization of my minced products but also help me stay within my budgetary limits.
Frequently Asked Questions (FAQs)
Q: What are the benefits of grinding my meat?
A: Grinding your meat allows for greater control over the meat’s quality, fat content, and freshness. It also enables customization of flavours and textures, ensuring the final product meets your taste preferences.
Q: How can I ensure food safety when grinding meat?
A: To maintain food safety, always use clean equipment and surfaces. Keep meat refrigerated before grinding and work in a clean environment to prevent contamination. After grinding, refrigerate or freeze the beef promptly.
Q: How long can I store ground meat?
A: Ground meat can generally be stored in the refrigerator for 1-2 days. If you plan to keep it longer, it’s best to freeze it, where it can maintain quality for up to 4 months.
Q: Can I grind different types of meat together?
A: Yes, you can mix different types of meat while grinding. Combining beef with pork or lamb can enhance flavor and texture, providing you with a balanced fat ratio for optimal results.
Q: What tools do I need to grind meat at home?
A: You will need a meat grinder or a food processor fitted with a grinding attachment. A sharp knife and cutting board can help prepare your meat before grinding.


