
In the realm of universal kitchen gadgets, the KitchenAid standing mixer immediately springs to mind; however, it has become even more powerful and beneficial thanks to the use of its KitchenAid attachment as a meat grinding accessory. Enthusiasts can request expensive food preparation aids, along with learning how to mince almost any product, even at home. However, being an area with multiple options, choosing the best meat grinding attachment can be a bit tricky. This article provides an in-depth look at KitchenAid’s various meat grinder attachments, their functionalities, and additional features that enable you to achieve maximum output. By the last page, you will hold a perfect idea of how to fine-tune your culinary skills and add some control and fun to the kitchen!
Product Features of the KitchenAid Meat Grinder

- Durable Construction
Advanced modern equipment enabled the production of the grinder parts from food grade safe materials with the aim of guaranteeing longevity and safe operation while handling food.
- Multifunctional Design
This particular attachment can take care of some of your frequent needs, such as pizza toppings or even grating some parmesan cheese or evacuating antipasto, in just a few minutes, leaving room for other ingredients in such a recipe.
- Multiple Grinding Plates
There are three types of grinding plates: fine, medium, and coarse, so customers can always adjust to the proper consistency for the dishes they are making, including but not limited to burgers, sausages, and pates.
- Easy Assembly and Cleaning
The materials are made for easy fitting, most of them may just be put in a dishwasher so as to save oneself the hassle of having to wash them by hand after using them
- Compatibility with KitchenAid Stand Mixers
Made from an especially adapted adjustable KitchenAid mixer, it is possible to effectively extend the power that will be required for meat grinding.
- Sausage and Food Processing Accessories
Benefits include some extras like warranty and recipes, plus sausage stuffing shapes that make it easier to stuff sausages neatly and thoroughly without borrowing from someone else.
Specifications and Design
KitchenAid has incorporated food-grade steel into durable and hygienic food equipment. It comprises both a fine, medium, and horizontal story cutting knives, and importantly, achieves the kind of texture and consistency that a cook would desire. This will prevent any play or shaking of the machine and thus, precautionary measures have been taken to reduce noise and vibration levels for the customer
It is a convenience attached to a mixer being light and small, making storage easy when not in use and useful for hard materials and abrasive activities. This also includes a power-efficient system integration that uses the motor of the stand mixer to assist in processing large quantities of meat, vegetables, or other foodstuffs in seconds. Easy for use, all these components can be removed and, most importantly, cleaned anywhere. If you happen to have you mixer sitting in the kitchen, it may serve you well.
Compatibility with KitchenAid Stand Mixer
Designed with universality in mind, the attachment is to work with any model of KitchenAid mixer by utilizing the power hub which is common in all of them. Striving towards this universality, the connection is made efficient and secure and the power transferring is made optimal for the best results. Whether the model is a bowl lift or a tilt head, the attachment fits well and still meets the KitchenAid requirements not only in design aspect but also in functionality. Most importantly, the attachment is built adhering to the same quality as the brand’s mixers, guaranteeing that even the most advanced culinary preparedness can be achieved without fear that it will fall apart.
Unique Grinder Attachments
There are specific accessories, such as grinder tools, that have been solely developed to expand the operation of KitchenAid mixers, thereby realizing the full potential benefits with regard to food preparation. The grinding attachments have been manufactured using premium materials to ensure that the durability of the attachments is always assured as well as reaffirm the performance of the attachments. In other words, the targets there on the meat and the old runs achievable are ground meats, hard cheeses, bread into breadcrumbs, and even vegetables, which all amount to invaluableness in regard to both family and professional chefs. This means that there are no chances of manual grinding causing too much heat due to the advanced mechanisms, such as lower friction and two-directional operation, that alleviate the heat. Additionally, most models are reusable with cleaning components that are washable, hence addressing the cleanliness issue. The tweezers are designed with a sturdy rubber grip, which management fits snugly too, thereby serving as the perfect component for enhancing culinary skills.
Benefits of Using a KitchenAid Meat Grinder
- Customizable Grinding Options
Meat grinding using a kitchen attachment also has the benefit of grinding meat to one’s liking. As to the styles of minced meat, it enables the preparation of fine cuts needed for making sausages or coarse grains needed to make burgers.
- Enhanced Freshness and Quality
Grinding at home is more beneficial than buying pre-packaged meat since one will be able to pick the kind of meat they want to grind, and eliminate preservatives normally added to readymade meat.
- Versatility
This grinder helps facilitate no-fuss preparation of other products such as vegetables, bread making or even grinding nuts among other food items, turning it into a practical and versatile equipment in the working kitchen.
- Durability and Reliable Performance
The durability of the meat grinder attachment is achieved by the use of heavy duty materials which ensure that it is able to perform efficiently and effectively on a continuous basis even when used regularly.
- Ease of Maintenance
Furthermore, the majority of these parts are intended for brief and easy separations from the food preparation system, or fast cleaning and these sustainable consumption mechanisms guarantee improved hygiene even upon further applications.
Versatility in Meal Preparation
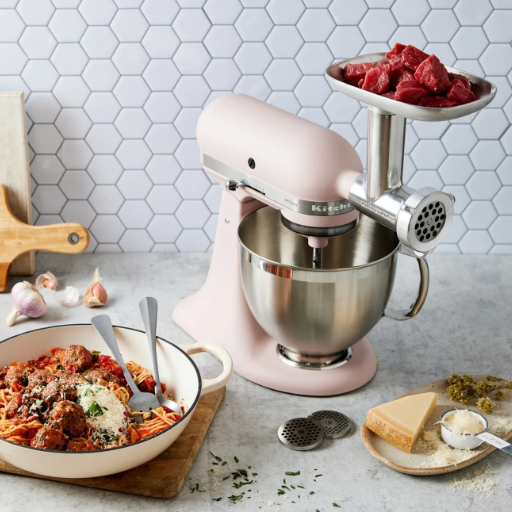
One of the accessory meat grinders models increases the applicability of the attachment inside the kitchen as it enables very precise alterations at the most elemental degree of food preparation. Consumers can create sausages, hamburger patties and pâté as well as their more natural and nutritious substitutes from a range of meats using most of it parts. The equipment is very useful as it can also serve for other relevant activities for instance making breadcrumbs, thin sheets of pasta or even some baby food purees among other uses. This is particularly useful in a context where it has become necessary to attend to more diverse dietary preferences and new cuisines that are more creative and innovative with a preference on health-conscious and customized meal options. Such functionality ranks this device highly within industrial and domestic usage where in addition increase the level of cooking skill efficiency is desired and prior quality standards and health are aimed at.
Ease of Use for Home Cooks
Durability and Performance
How to Use the KitchenAid Meat Grinder?
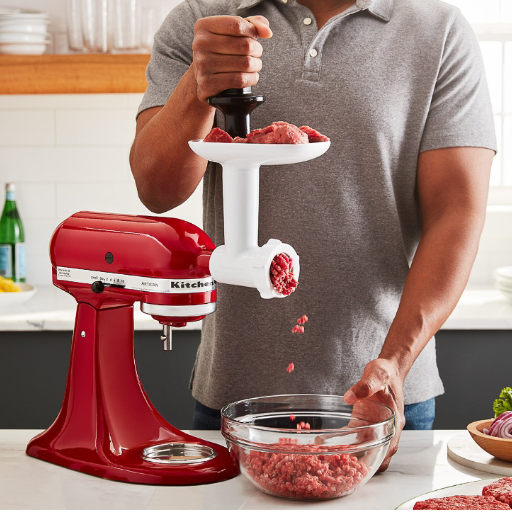
- Prepare the Grinder: Assemble the grinder by attaching it to the hub of your KitchenAid stand mixer. Ensure all parts, including the grinding plates and blades, are securely fitted and tightened.
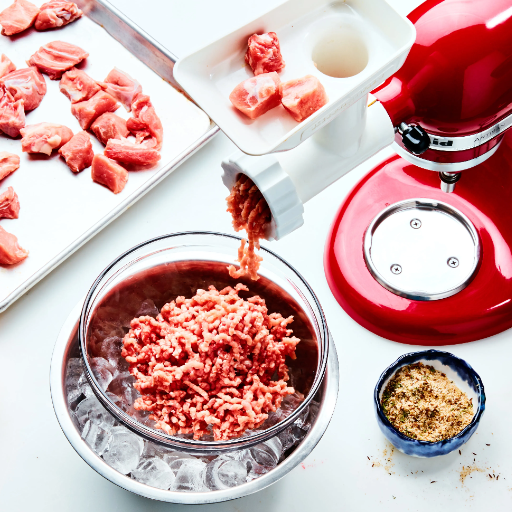
- Chill the Components and Ingredients: Before the grinder is up and running, allow the metallic parts of the grinder and the meat to sit in a chiller or freezer for 15 to 30 minutes. Cold equipment and meat components make the grinding process less likely to stall and add more uniformity.
- Cut the Meat: Remove any excess fat, grizzle, and bones from the fillet of the meat and, cut it into relatively even sized pieces, preferably 1in cube.
- Start the Mixer: Switch the Kitchen Assistant equipment to a normal operations level at a particular speed say level four typically. Slowly feed the meat to the grinder constantly using the push stamper provided. Do not attempt to push it in.
- Collect the Ground Meat: Employ a clear vessel to collect the minced meat as it discharges from the dairy. For large amount of grinding going on, grinding should be done in turns.
- Disassemble and Clean Thoroughly: When over, disassemble the grinder fully and clean all the parts using warm water with soap. Leave the items to dry before putting them in storage to avoid corrosion.
Always consult the product guide or manual for specific help and safety measures. If all these steps are taken, the KitchenAid meat grinder can be used, and efficient and constant results will be attained in no time.
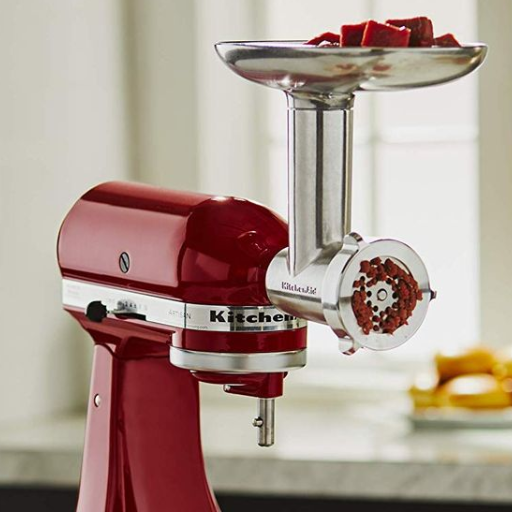
Assembling the Meat Grinder Attachment
- Prepare the Components: Begin with an analysis of the equipment to be provided, additionally involve the housing, grind screw, blade, plate and food pusher. Remember to check that all parts are properly washed and dried as this helps maintain cleanliness and functionality.
- Attach the Grinder Housing: Align the grinder housing underneath the power hub in the front of your stand mixer. Place the housing in the power hub and twist it slightly to lock it on the position. Ensure it is secure for no movement during grinding.
- Insert the Grind Screw: Fit the grind screw to the meat grinder housing, keeping the rotations of the screw angles correct and without being forced.
- Add the Grinding Blade: Put the blade on the edge of the screw, and make sure the sharp edges are pointing outward. Blade must be well done, adjusting straight for best grinding.
- Select and Install the Grinding Plate: Select the grinding plate suitable for your cooking (either coarser or finer). Fasten the placing plate onto the blade, making sure that there is no edge protruding from the walls of grinder housing.
- Tighten the Collar: Fasten the collar in a clockwise motion at the tip of the food grinder housing. You should not overtighten the collar, as doing so will bend the attachments or cause problems with the food grinding process.
- Attach the Food Tray: If the meat grinding attachment features a food tray, set it on top of the grinding housing assembly, making sure that it sits in place tightly.
Through following these thorough checklists, checking the meat grinder attachment for appendage is a breeze. Proper arrangement is extremely important if to avoid inconsistencies and possible errors in the course of usage. Refer to the given specifications as per the manufacturer’s instructions when necessary.
Making Sausages with the Sausage Stuffer
For purposes of using the sausage stuffer attachment, various preparation and execution stages are required in order to produce quality sausages. It is vital to follow the procedures, check that all components i.e. the grinder, stuffer tube and casings are clean and installed as indicated by the manufacturer. For better results, use consumable casings that are either natural or artificial and which have been treated and soaked to enhance their stretchiness and strength particularly during the stuffing process.
Firstly, prepare the sausage by mixing the ground meat with the required seasonings and any other components, such as herbs or breadcrumbs, depending on the specific recipe. Again, use cold ingredients to avoid the foods from becoming mushy. Finally, the blended mixture is transferred into the tote section of the grinding machine or the stuffer, ensuring not to overfill the chamber, as this might cause hiccups due to the air flow.
When filling the stuffing tube, make sure that the casing is well placed by leaving the casing hanging out a bit from the bottom part of the tube, as it will be much easier to tie once the stuffing starts. In effect, use the grinder even if you are pushing the need provided while filling the casing for it to have an even meat distribution and not tear the casing. When the sausage measures reach the desired length, hand-tie or twist each filled sausage casing to create a sausage. Period monuments must be held without any deviation.
Comparisons with Similar Meat Grinders
In the examination of different meat grinders ratings in terms of the present version, several important factors should be noted as regards the advantages of working with them:
- Build Quality: Unlike most of the same-price meat grinders, this model is made of durable stainless steel, which makes it last longer and free from rust, thus whether the grinder gets destroyed very soon or it is durable, it is able to grind as much meat as required by most consumers.
- Grinding Efficiency: And owing to the powerful motor, this grinder handles large volumes of meat faster and more evenly than its competitors do which cuts back on time spent on a preparation.
- Versatility: Whereas with certain similar grinders a person can only grind the meat, while with the said meat grinder it is possible to grind the meat and to use it for and powdering; for this purpose, it also has additional extensions.
- Ease of Maintenance: The design incorporates removable parts that are dishwasher-safe, which outpaces alternatives requiring manual cleaning or specialized tools.
Going off of the attributes above, this meat grinder shows how it has considerably more ruggedness, productivity, and user friendliness as compared to other grinders of its nature.
KitchenAid vs. Other Electric Meat Grinders
|
Feature/Parameter |
KitchenAid Meat Grinder |
Other Electric Meat Grinders |
|---|---|---|
|
Build Quality |
Durable metal construction |
Varies, includes lighter plastic options |
|
Grinding Capacity |
Suitable for home and semi-professional use |
Wide range from low to industrial levels |
|
Attachments |
Multiple, including sausage stuffer and food grinder |
Limited or single-purpose attachments |
|
Ease of Cleaning |
Dishwasher-safe removable parts |
Often requires manual cleaning |
|
Motor Power |
Moderate power, adequate for most household needs |
Ranges from low to high power |
|
Versatility |
Accommodates various grinding textures and food types |
Limited versatility in some models |
|
Noise Level |
Medium noise output during operation |
Can range from quiet to loud |
|
Maintenance |
Easy to maintain with accessible spare parts |
May require professional servicing |
|
Price Range |
Mid to high range |
Broad spectrum, often cheaper options available |
|
Warranty |
Typically includes a robust, longer warranty |
May offer shorter or limited warranties |
Price Points and Customer Satisfaction
There are a few trends that emerge in different product categories and this is when customer satisfaction is considered in relation to price points. Products which fall in the medium to high price bracket generally lead to higher satisfaction levels due to their enhanced quality features, initial release, and other features but many at times, some such premium products will also appeal to certain customers who will not mind spending in order to get the product. But value also seems to change through time as more and more customers seem concerned with seeking what appears as cheaper products only to find that such products have challenges of ability or performance because customers are concerned with value including the cost elements of the all-inclusive service package and not price for the device only.
Moreover, with more information made readily available, the current consumer has shifted his focus on more than just price changes, but multiple other abstract dimensions that offer value like guarantees or warranties and the existing firm’s customer picnic activities. Such a move can only call to the adjustment that is required when setting prices and how the benefits will be judged. Next, it is apparent that clear pricing as well as product specifications are crucial in building customer relationships, particularly with reviews and assessment systems online becoming more and more influential in motivating buyers to make purchases.
Unique Features of the KitchenAid Model
In regard to its combined functionality and attention to detail, the brand in question has imposed a preset program for home and commercial use. Ministand competitive advantage would include specifics with motor that is not only powerful but is capable of ensuring uniform performance even when carrying out diverse categories of mixing work such as dough incorporation or mild cream whipping. Additionally, the item is designed with a planetary action mixing mechanism which mixes gently all the ingredients with the beaters turning in one direction and the shaft in another.
In addition, the Kitchenaid model comes with a number of useful attachments allowing minting such as slicing, mincing, attaching, or carving vegetables. In terms of usage, it is convenient and has strong support in form. all metal alloy construction helps in increasing longevity of usefulness, since no matter how much wear and tear it gets the stand will still be there bearing the load. Other than that, the speed control is one of the crucial elements in a stand mixer because it helps maintain consistency. The new versions have some special features like connectivity apps, boxed programs and other features to make sure that the user is as convenient as possible. This is what makes the KitchenAid model exceptionally advanced and very popular.
Maintenance Tips for Your KitchenAid Meat Grinder
- Disassemble and Clean After Every Use – It’s necessary to take the meat grinder apart and have it scrubbed each time it gets used. All parts, including the blades and the plates, as well as the food pusher, should be washed in warm, soapy water to get rid of any of the meat stickiness. Do not be harsh and use substances that may keep the components from deteriorating.
- Dry Thoroughly – Make certain every element is put aside and it is air-dried before placing it back into the grinder or before locking it away. The moist pads as they tend to rust the blade primarily and the grinding plates, more especially the ones that are not made of plastic.
- Sharpen the Blade Regularly – Grinding becomes comfortable when the blade is sharp; its sharpness improves the efficiency of the motor as well. Without grain, the light usually does not dwell, so make sure no one lets it drill and remove or grind the portions when the edge no longer cuts.
- Lubricate Metal Parts – Spread food-safe mineral oil or grease to metal parts so that they are protected from rusting. The excess oil should be removed before applying the parts to food use, such as cutting meat
- Inspect for Wear – Warned that plastic parts might have cracks, or shooting plates may be bent; therefore, it is best to check these parts regularly. Replace all those parts that are not functioning correctly.
- Store Properly – It is highly recommended to store this equipment in a dry and cool place. Store all small components such as holes and blades in a, preferably, some kind of container to prevent these parts from damage.
Using these few maintenance steps, the KitchenAid meat grinder would be extended with increased effective use as summarized next.
Cleaning and Storage Practices
Don’t compromise your reasonable thoughts by eating all the well-cleaned roasts, vegetables, couches, and things you have bought; take care of the tools. Thus, after using them, everyone, that is, all pieces such as grinding plates, rotors, and funnels. Put all tis good water and gentle soap to wipe down all meats so that all corners or all corners where brown pieces of meat resisted cleaning are thoroughly washed. Also, use a tiny, hard brush such as the one used to clean teeth to brush off small pieces of dried particles on the walls of the narrow surfaces of hard-to-reach areas.
When cleaned, all pieces should be dried completely; thus, again, you will even need to do so if any of the parts are metal. Patterns with fabric are well known to take time to dry, so it is advised to use air with a fan functioning fully to air dry quickly. Put a thin layer of food oil on the plates of metal blades and other metal parts to maintain food safety from inside the blades.
Store in a room that is dry and has an even temperature, which is favorable to the KitchenAid meat grinder. In the case where wear and tear is likely for certain features, such as blades and plates, those parts should always be kept in a container that is properly sealed. Hygienically, they safeguard the food from the formation of bacteria as well as items taking any damage in the preparation and serving of food. Therefore, it’s advisable to take extra precautions to protect and make the grinder last with efficiency over time.
Maintaining Grinder Attachments
When someone wants to make the best use of the grinders, evaluation of cleaning on all the attachments is necessary at all times. The attachments are separated and cleaned monthly, ensuring no residue is left on them. Washing should be with liquid and lander and purify each item, paying attention to any fiddly parts and the hidden areas. Stainless steel attachments, such as blades, should not be allowed to stay wet for any length of time in order to stop oxidation and discoloration.
Reference Sources
-
KitchenAid Metal Food Grinder Attachment Review – Business Insider
- Summary: This review highlights the durability and heavy-duty design of the KitchenAid meat grinder attachment. It weighs about 2.5 pounds and is praised for its robust build. The article also discusses its ease of use and effectiveness in grinding meat for various recipes.
-
The 6 Best Meat Grinders of 2025, Tested & Reviewed – Serious Eats
- Summary: This article recommends the KitchenAid metal grinding attachment for those who already own a KitchenAid stand mixer. It emphasizes the attachment’s convenience, compact storage, and excellent performance in grinding meat.
-
How to Use a Meat Grinder – KitchenAid
- Summary: This guide explains the components and functionality of a meat grinder, including the hopper, tray, and grinding plates. It provides step-by-step instructions for using the KitchenAid meat grinder attachment to mince and mix fresh meat and other ingredients.
Frequently Asked Questions (FAQs)
Q: What are the benefits of using the KitchenAid meat grinder attachment?
A: The KitchenAid meat grinder attachment offers a convenient way to grind meat at home, giving you control over the quality and freshness of your ingredients. With this attachment, you can grind a variety of meats, from beef to turkey, and even make your own sausage using the sausage stuffer tubes. The attachment is designed to work with the KitchenAid® stand mixer, harnessing its power to make the grinding process efficient. Additionally, the metal food grinder attachment is easy to clean and is dishwasher safe, making maintenance a breeze. Overall, this attachment allows you to create freshly ground meat for your favorite recipes while ensuring you know exactly what goes into your food.
Q: How do I install the meat grinder attachment on my KitchenAid stand mixer?
A: Installing the meat grinder attachment on your KitchenAid stand mixer is a straightforward process. First, ensure your mixer is unplugged for safety. Then, align the attachment with the power hub of the stand mixer and slide it into place until it locks securely. Once attached, you can choose from various grinding plates, including coarse grinding plates and fine grinding plates, depending on your desired texture. It’s essential to use the right plates for different types of meat, as a coarse plate is ideal for making sausage, while a finer plate is better for ground beef. After installation, you can start grinding your favorite cuts of meat with ease.
Q: Can I use the KitchenAid meat grinder to grind other foods?
A: Yes, the KitchenAid meat grinder attachment is versatile and can be used to grind other foods besides meat. You can use it to grind hard cheeses, fresh garlic, or even make breadcrumbs with stale bread. This makes it a multifunctional tool for your kitchen, allowing you to prepare various ingredients for different recipes. The metal food grinder is particularly effective for grinding fresh ingredients, ensuring you achieve a clean grind every time. Remember to maintain a cold grinding temperature for optimal results, especially when grinding meat.
Q: What is the difference between the KitchenAid metal food grinder attachment and a dedicated meat grinder?
A: The primary difference between the KitchenAid metal food grinder attachment and a dedicated meat grinder lies in their design and functionality. The KitchenAid attachment is designed to work with the KitchenAid® stand mixer, allowing you to utilize the mixer’s motor to grind meat and other foods. In contrast, a dedicated meat grinder is a standalone appliance that typically offers more power and capacity for larger batches. While both options can effectively grind meat, the KitchenAid attachment provides more versatility, as it can also grind other ingredients and is more compact for storage. However, if you frequently grind large amounts of meat, a dedicated meat grinder may be more suitable for your needs.
Q: How do I clean the KitchenAid meat grinder attachment?
A: Cleaning the KitchenAid meat grinder attachment is simple and straightforward, ensuring your attachment remains in great condition. After use, disassemble the attachment by removing the grinding plate, feed tube, and knife. Rinse all parts under warm water to remove any meat residue. For a deeper clean, you can use a cleaning brush to scrub the components gently. Most parts of the metal food grinder attachment are dishwasher safe, making cleanup even easier. Avoid using abrasive cleaners or scouring pads, as these can damage the finish of the attachment. Once cleaned, allow the parts to air dry completely before reassembling or storing them.


